Showing posts with label DIY. Show all posts

Monday, December 10, 2012

moody

In my wonderfully warped world I'm super awesome at everything. In my latest attempt to be something I am not, I decided to create a mood board for Liss's little girl that's on the way, or Baby Peaches (BP) as I (Jackson) call her.

Liss told me what she wanted for a color scheme so I started googling stuff, and found this amazing (aka $$$$$$$$$$)  bedding on etsy.  I was instantly in love with that fabric, and then tried very hard to find it on google. Suprisingly enough, entering "aqua coral floral fabric" doesn't yield the results one would hope. Luckily, I'm super smart and emailed the etsy seller asking her who makes the fabric.  She got back to me rather quickly and I went ahead and entered the designers name into my google search bar. (I swear..google didn't pay me to say google a certain number of times in this post..though that would be pretty cool.

So here is the $60.00/yard fabric that started it all (now I know why the bedding was so expensive!)

Caitlin Wilson Textiles (AMAZING!!)


Aside from the unobtainable fabric, all I knew is that Liss wanted grey chevron and we'd most likely do that for the crib skirt and maybe for the window seat she was making (stay tuned, she'll have a guest post on that soon).

So, I started that crazy googling again and was putting my finds over on my polyvore account to create my first every mood board.  VIOLA!


nursery idea


Liss ordered all the fabric, and she's already done the curtains, as you saw in this post.  I made the baby blanket and a pillow, and ordered her the super duper cute bunny over at etsy.  I still have to order her coral fabric and make slipcovers for the glider cushions...but since I'm obviously so good at everything, I'm sure I'll get that done in no time. HAHAHAHAHAH!

Once she (we?) have more of the nursery done I know that she'll post more pictures!

Also, if you like free stuff, head on over to Natalie's blog for a give away!!!


siggy

Friday, December 7, 2012

finally....some #$@#$ pictures!!

These pictures are going to be crap quality because I took them at night, with my iphone...but crappy pictures are better than no pictures right?

Let's start with IKEA. IKEA is evil. it's like Target but more expensive and you need a truck. Liss and I headed down to IKEA last weekend so she could buy her bookcase that she's turning into a window seat in BP room and I went to get the TROFAST and turn it into something like this:

http://ericandlydiasfamily.blogspot.com/2010/05/lego-my-messy-legos.html

Bye bye big bulky train table, hello sleek awesome lego table.

I also wanted to get some new shoe storage. I was over the bench that we had in there since we moved in. It always just collected crap, and I was sick of shoes everywhere.  Because I'm so original, I went right over to YHL to look up the shoe storage they had done in their laundry room. IKEA being so smart decided to discontinue Retur and re-market it as shoe storage and sell in a three pack. Very tricky IKEA.  They are now called TRONES.

I had a list. A very strict list of what I needed at IKEA. We walked in and decided to look around even though we both knew what we needed. Bad idea. Very bad.  The first or second living room we walked into I exclaimed "this is where I want to live!" it was so cozy and warm and inviting and had a cute little corner with a desk very similar to the one I had purchased there before and turned into a chalk table.  It also had a roll of paper hanging near it.  I was inspired.  To be honest, I had seen something similar when MODG revealed G's big boy room and loved it.

I also found frames for $1.99, and since pictures of my kids in frames is pretty much a Christmas gift staple, I picked up a bunch of those. Oh, and a tiny stuffed moose. But I digress. Here are the pictures!!

So I had to do some maneuvering to bring the kids table into the living room, but I have to say I love it. For some reason when the couch is up against both walls, it just seems so much more cozy and open.  Here it is with our new "snow" pillows as Jackson lovingly calls them.

Photobucket


So to the right of the couch is the new kids corner:

Please excuse the super safe exposed electrical outlet. I have a cover for it..somewhere..

Here is the new entryway/shoe storage (or shoe dispenser as Michael calls it)


Also, there's our Christmas tree!! So, there'a  quick update for you of what's been going on.  I have like 2 bagillion things to do before Christmas, so wish me luck!!!


siggy

Thursday, December 6, 2012

child labor

Lot's has been going on at casa de kenney, but due to lack of time I've (as usual) not been great about uploading my photos. I definitely need this, like yesterday:


Moving on..

I've tackled a bunch of projects over the past month or so. I updated our throw pillows to be more wintery, moved around the living room a bit, decorated for x-mas, made a new "kids corner" in the living room, and changed our coat hook/shoe storage situation.  I also FINALLY painted the IKEA chairs from the chalkboard table I made for the kids a few months ago.

I picked out two paint pods over at Ace Hardware, one in red and one in aqua. My goal in all of this is to start bringing in pops of red, and I'm considering painting the bookshelf in my kitchen red, but not sure if it will be too much.  I later read online that you probably shouldn't use paint pods for real painting, but I did it anyway. Since these were just cheap-o kids chairs, I wasn't really concerned with the quality.

Biggest mistake I made was telling Jackson about the paint on our way home. He wanted to see it so I pulled the pod out of the bag and showed him. This of course led to him having to hold the paint all the way home, then Taylor of course needed her paint. This all turned in to me getting home, setting up two paint stations, and letting a 4 year old and a 21 month old paint furniture. Pure. Genius.

This is the only picture I have as you can imagine attempting to take "in process" photos of two young kids painting furniture wasn't happening. Jackson actually did a pretty good job. Taylor was a mess and gave up after about two minutes (thank God!). I went over their work and smoothed everything out. It took 2 coats of the aqua and 3 coats of the red, but I'm happy with how they came out. More pictures of my new kids corner and all the other fun crafts soon. I also need to get my  hands on baby shower pictures (LISS!!!) so I can post about the craftiness of that.


peace!

UPDATE: I came across an amazing blog  (Mama's Losing It) and she does this really cool writer's prompt link thingy..so I'm linking up with her today for# 3 What's the last thing you bought.  duh. paint pods. Hoping to do this every week. so fun!!


Mama’s Losin’ It
siggy

Friday, November 23, 2012

Fail- Curtain Color

Fail: Curtain Dyeing

 So my friends, after TWO more attempts at dyeing the curtains (I had two bottles so what the heck), I've given up. 

As you can see below, the color is a BIT darker/slightly greener but still nowhere close.
Also you can see the curtains did not fair well through multiple washings, as there are pulls in the fabric. 

I think I'm going to take a step back and maybe tackle the crib sheet situation first- finding an aqua crib sheet has proven to not be very easy. 

Amy and the clan are also coming over tomorrow and I'm sure Amy will have some brilliant ideas.

Have a wonderful Friday everyone!

 booo

 Owl says "close but no cigar!"

 You can see the pull in the fabric to the left of the owl


Tuesday, November 20, 2012

Guest blogger- Welcome Liss!


Intro: Liss is my amazingly wonderful sister who has asked if she can guest blog and share the many projects she has going on right now, the most important of which is "baking"  my wonderful soon-to-be-niece. Welcome super-fabulous-awesome-couldn't ask for a better sister, Liss!

Hi! Thanks for the warm welcome, Amy! Ok, I should start by being honest and tell you I wrote that intro myself. But I'm sure Amy would agree with everything I've written.
Thank you  Amy for letting me join you on drive thirty-three. As Amy mentioned, my little family (hubs and 2 cats) are embarking on a new adventure and will be welcoming our new addition, BG (baby girl) in February. And as I've learned over the past few months, along with babies comes... stuff. Lots of stuff.  

We currently live in a condo with a loft.  The loft has been used as office/guest area/let's-put-it-upstairs-because-we-don't-have-anywhere-else-to-put-it space.  However with BG on the way we have a logistical issue- the loft is not an enclosed space, and we are using the other room for our bedroom. As much of an amazing sleeper as I know our baby will be (stop laughing) I think expecting the little angel to sleep 12 hours a day when exposed to the TV and the hubs' guitar-playing is a little too much to ask for.  So, that leaves us with moving our bedroom to the loft, and making our room the baby's room. Sounds simple, right? We shall see. The transition will be gradual, as BG will sleep with us in her bassinet when she is brand-new, but I'm still planning on moving forward with some design ideas I have in the meantime. My designer and consultant (aka Amy) helped put together a mood board of patterns and ideas which I am hijacking her blog to share and track our progress. It shall be called..... The Great Room Swap of 2013.

Here's where we are so far:
Current Bedroom with planned changes. Yes I am a professionally trained artist.


In an effort to not drive hubs (J) insane, I'm trying to tackle some small projects first. First project up is: 

Dying curtains.
The plan is to hang aqua/turquoise curtains over the windows with blackout linings. Unfortunately I've found it nearly impossible to find curtains that are the right color and aren't $$$$$$. 


The closest I've come to are these curtain panels from ikea, which at $49.99 for a pair are fairly reasonable, but still more than I'm willing to spend (you'll learn quickly that I'm cheap  thrifty.


At a bit of a loss, I consulted my good friend Google and came across this  post on dyeing fabric. Seemed pretty easy, so I went to ikea and bought some cheap white curtains, and then went to Joann Fabrics and bought some Aquamarine Rit dye. I wasn't sure about the color but it was the closest they had in stock, so I took a chance.


Here is the play by play on my Dye Attempt #1:

Step 1: Unfold ikea curtains flat. 
Admire their lack of color:

Step 2: Take Rit liquid dye out of Joann Fabrics bag. 
Admire aquamarine color and read instructions:


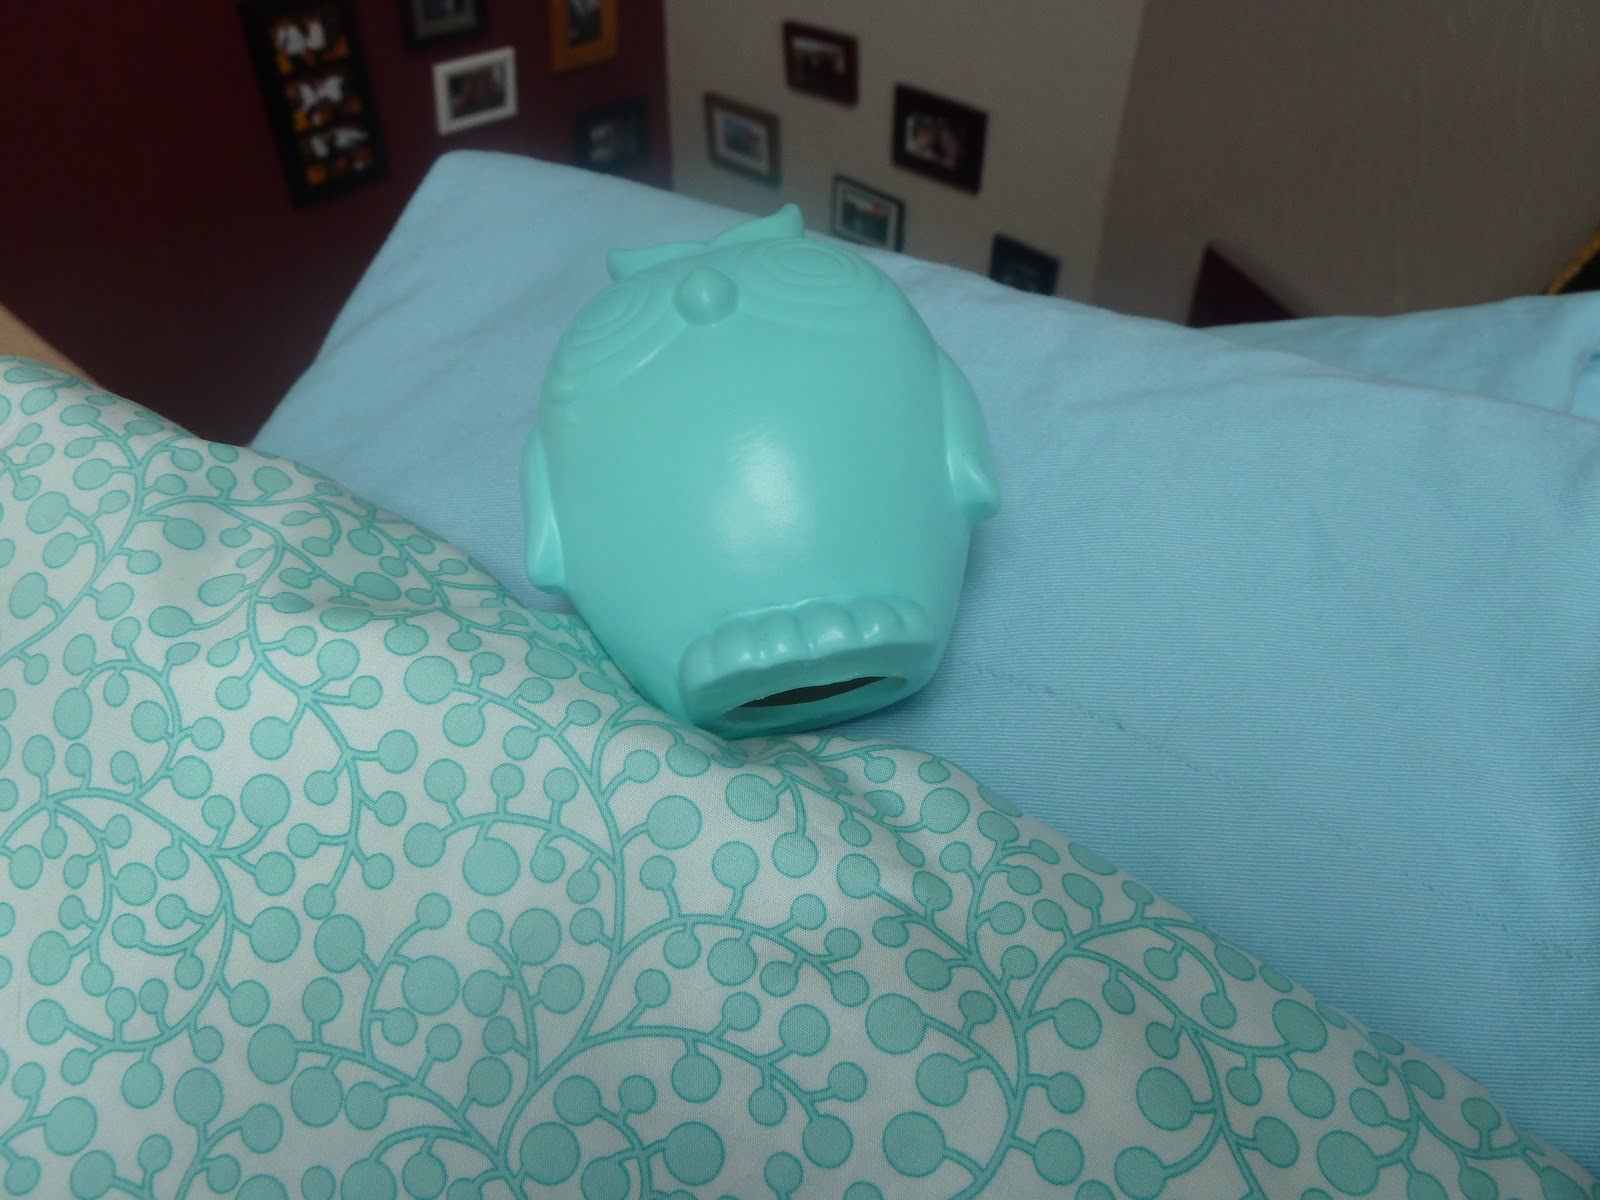
Step 3: Compare dye to the fabric that the curtains need to match. 
Grow skeptical about color choice.
Perfect right??? Umm.... not quite.


Step 4: Soldier on because this is an experiment and if Marie Curie had 
stopped when the going got tough we'd never know there was any such 
thing as radioactivity and wouldn't wear iron aprons when we get xrayed.
Don't give up!

Step 5: Instructions say to fill washer with hot water, add dye, agitate, 
then put WET fabric in there. So, as the washer was filling up I threw 
the curtains in there, and when they were soaked I rolled them up and 
rested them on the side of the washer.

Step 6: Add dye, swish around with something disposable 
(I used a plastic hanger) and add fabric.

Step 7: Let washer run for 30 minutes 
(two 15 minute cycles- yes I'm a math genius too).
Once water is rinsing completely clean, 
wash the fabric in warm water with detergent.
 Already very evident that this color is a no go.

Step 8: Put the fabric in the dryer and run your washer with
 detergent and bleach. I had no bleach so I used white vinegar 
which worked fine.


Step 9: Admire your result, whether it is exactly what you wanted or not:
Too blue! Doesn't match pretty patterned fabric at all :(


So there you have it. Dye Job 1 doesn't work, as you can see below. 
I ended up ordering a couple more dyes online from Joann's, 
and they arrived tonight. 
So lucky you, you get 2 Dye posts in one night!


Dye Attempt #2: Teal Rit

Note: I also purchased iDye from Joann's which is a powder packet, but there was a rip in the packet when it arrived and I got powder ALL over my hands. Packet went directly in the trash.

Ok so I don't need to document step-by-step because you all are quick and have picked up on what to do already. So I'll spare you the suspense.


Initial examination of bottle compared to patterned fabric and dyed curtains:

      
   Definitely more promising. While a bit darker than the patterned fabric, 
the teal pretty much matches the outline color on the pattern. So far so good!


I followed the same steps for prepping the fabric and the washer. 
Here are a couple of progress shots:
 Work, dye, work!!

Looking good!!


So I lied- I am going to leave you in a bit of suspense. Curtains are still rinsing, it's almost 9:00, and I'm getting kicked in the ribs by BG who wants to go to sleep. I promise I'll update tomorrow with hopefully successful after pics!

Good night and cross your fingers!